How to use the job card
One card holds the whole job: customer, schedule, checklist, products, photos, notes, sign-off and finishing up.
The job card is what your crew opens on site. Everything they need is on one screen, and everything they do goes straight back to the office.
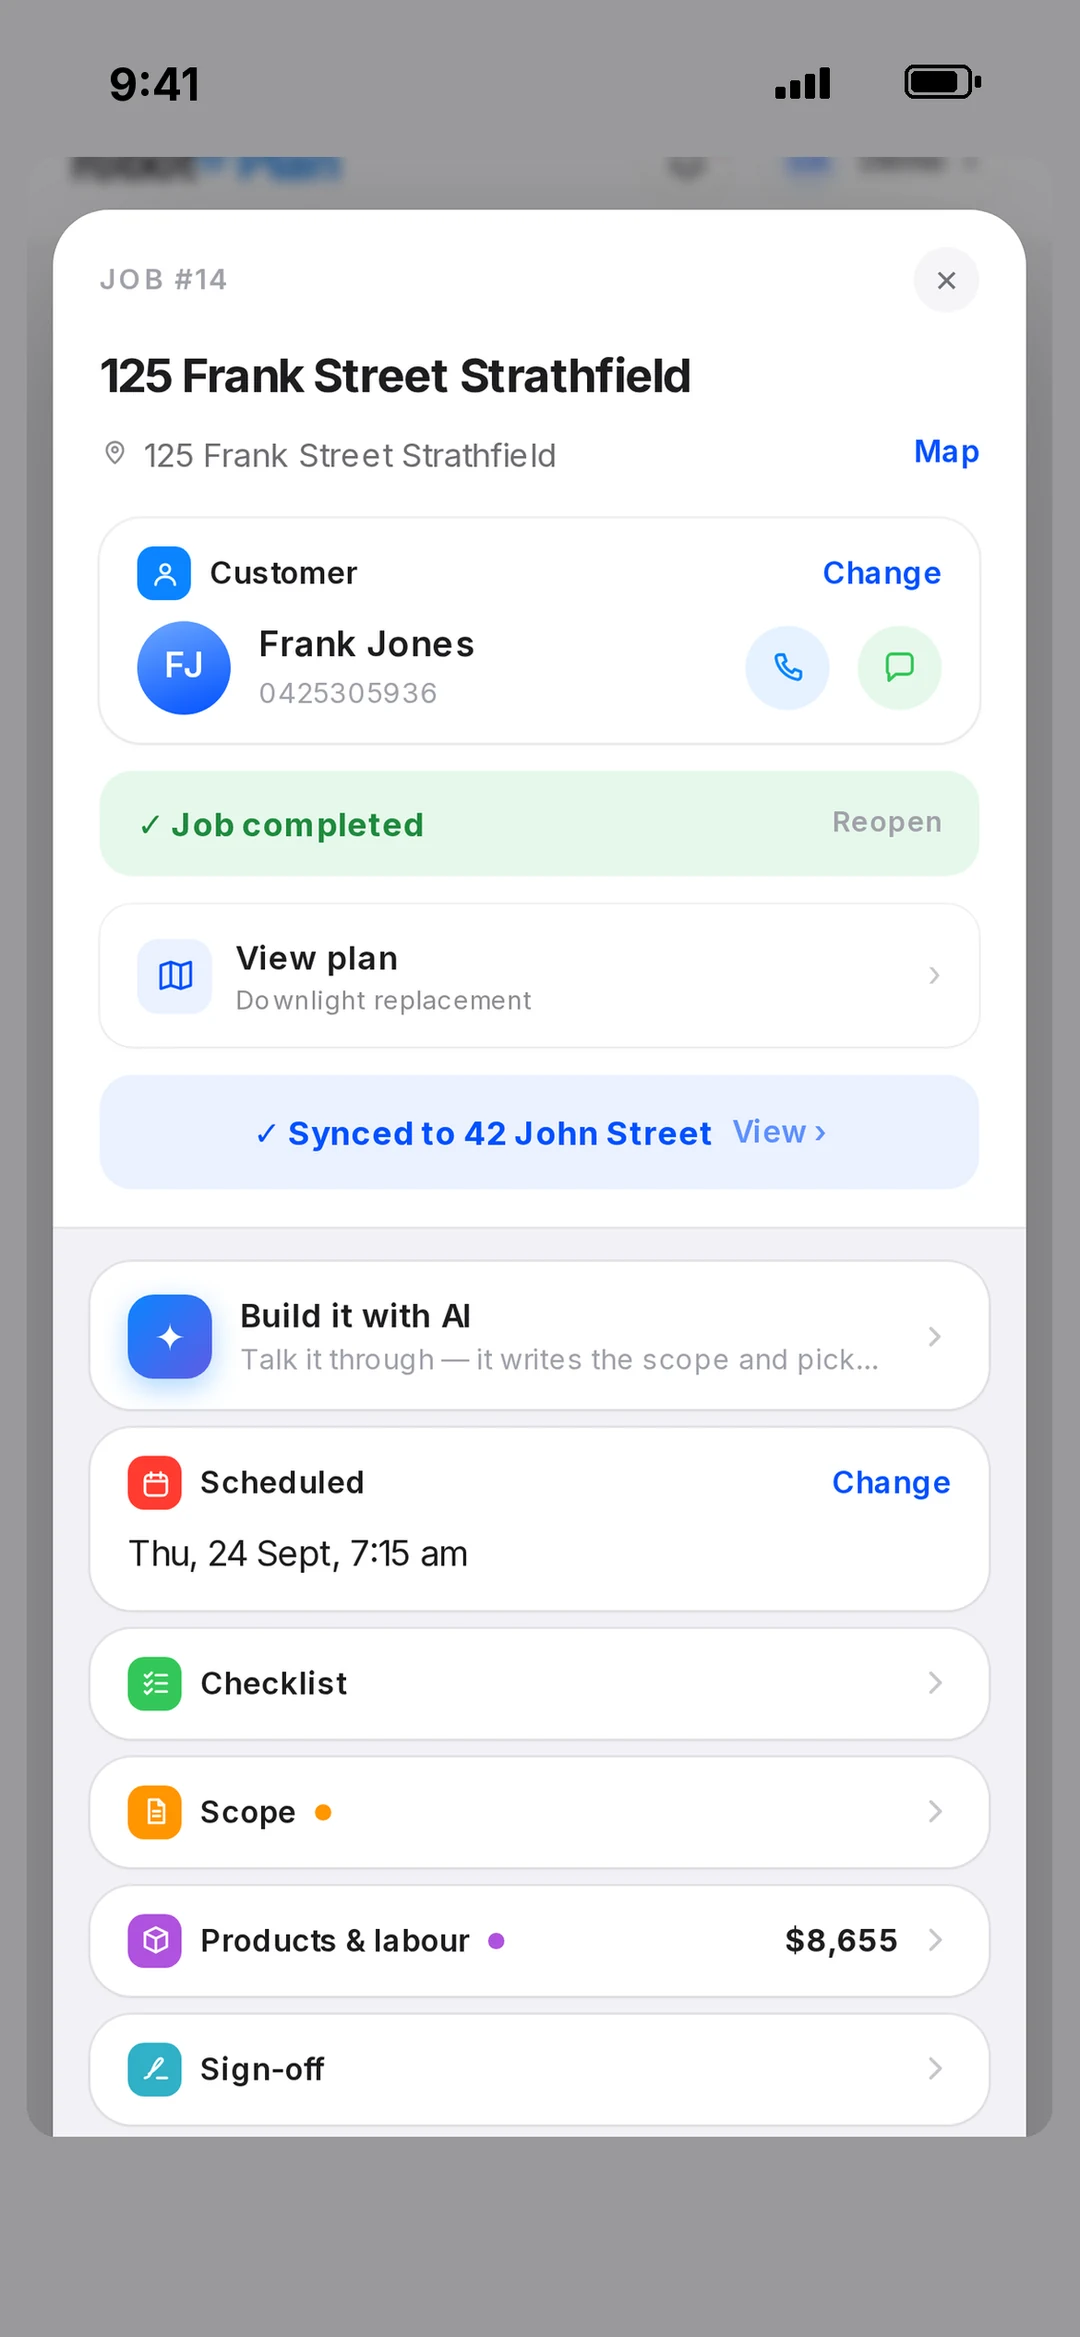
What’s on the card
Open any job from Jobs or the Calendar. Tap a section to open it:
- Customer: name and contact details, plus buttons to call or text them.
- Scheduled: when it’s booked and who’s on it. Tap Pick a time or Change to book it.
- Checklist: the steps for the job. Tick them off as you go.
- Products & labour: everything that will be billed. Lines copied from the quote are marked “quoted”.
- Sign-off: the customer signs on your screen.
- Site photos: before and after shots, straight from your camera.
- Notes: anything the next person should know.
Tap Map next to the address to get directions.
Start and stop the job
- 1Tap Start job when you get there, or when you head off.
- 2Turn on Text [customer] you’re on the way if you want to text them. It only works if they have a mobile number on file.
- 3Tick anyone from the crew who’s starting with you under Start for the crew too.
- 4Tap Start job again to confirm. The time starts counting for everyone you picked.
- 5Tap Stop job when you knock off. If you come back later that day, the button says Continue job.
You can only be on one job at a time. If you start a new job while another is still running, robot Plan asks if you want to stop the old one first.
Checklist, products, photos and notes
- 1Checklist: type into Add a step…, then tap Add. Tap a step to tick it off.
- 2Products & labour: tap + Add product or labour to pick from your Pricing Library, or tap Custom for a one-off item with its own cost and charge-out price.
- 3Site photos: tap the + tile to open your camera. The photo is saved to the job.
- 4Notes: type anything the next person on the job should know.
Get the customer’s sign-off
- 1Open Sign-off and tap Get signature.
- 2Type the customer’s full name.
- 3Hand them the phone so they can sign with their finger. Tap Clear to start again.
- 4Tap Save sign-off. The section then shows Signed ✓.
Finish the job
Tap the green Finish job button at the bottom of the card. You’ll see three options:
- More work required: the job stays open. Type what still needs doing, tick More products and/or More time, then tap Re-book now or Don’t know the schedule yet. What’s left shows as To finish on the card and on your jobs list.
- Job completed: marks the job done. Then tap Send to invoicing on the card when you’re ready. If the job is part of a project, it syncs to the project instead.
- Invoice Now · robot Pay: shows what’s being billed. Tap Scan to Pay to show the customer a QR code they can pay by card, Apple Pay or Google Pay. Or tap Send quick invoice to mark the job done and email the invoice.
Haven’t got the customer’s signature yet? Tap Get the customer’s signature first on the same sheet.
Changed your mind? A completed job shows ✓ Job completed. Tap Reopen to open it again.